

Your Halloween portrait starts with a point of view
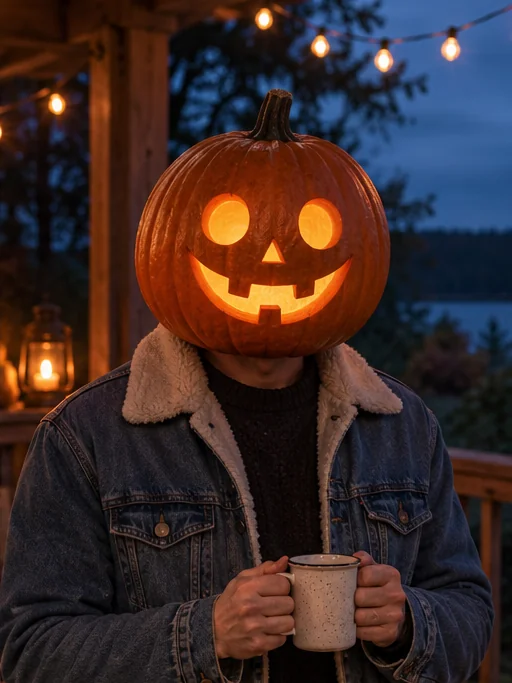
A pumpkin portrait does not have to mean a frightening face against a black background. It can feel like a walk through an autumn neighborhood, a fashion photograph outside an old cinema, or a cheerful character waiting on a front porch. Before choosing a style, decide what you want someone to notice first. Is it the expression carved into the pumpkin, the silhouette of the outfit, or the atmosphere around the subject? That decision gives the rest of your prompt a clear direction instead of turning it into a list of unrelated Halloween decorations.
Start with your own photo in this Pumpkin Head AI Generator. The uploaded portrait gives the transformation a visual reference: the person’s pose, outfit, and surrounding scene. Choose a mood to load a starting prompt, then adjust only the details you want to change. You can ask to keep the clothing and posture while replacing the head with a carved pumpkin. The prompt does not need a long story. A few concrete choices about the carving, setting, and lighting are more useful than a paragraph of abstract adjectives such as amazing, perfect, or spectacular.
Build an AI Pumpkin Head Effect that belongs in the photo
The most important distinction is between a pumpkin-shaped face and a physical pumpkin replacing the head. If you want the classic jack-o’-lantern character, say so explicitly. Describe a round or slightly uneven orange pumpkin with a stem, carved openings, and a believable connection to the neck or collar. Ask for a complete pumpkin rather than orange skin or a face mask. This gives the image a clearer visual concept, particularly when the original portrait has strong facial features or hair that could compete with the transformation.
Lighting is what makes the new head feel connected to the rest of the scene. A candlelit carving suggests warm illumination near the openings, while an outdoor afternoon portrait calls for daylight across the pumpkin surface. Mention the direction of the main light and ask for natural contact shadows at the collar. If the body faces left but the pumpkin looks straight ahead, decide whether that contrast is intentional. Inspect the result and revise the instruction that matters most.
Choose a reference photo with room for the transformation
Start with a picture in which the head, shoulders, and clothing are easy to see. A tightly cropped selfie can leave little room for a larger pumpkin shape. A portrait with some space above and beside the head gives you a more flexible starting composition. Think about the outline as well: hats, raised hands, scarves, and overlapping objects can make the area around the neck harder to describe. They are not automatically wrong choices, but they may need a more specific prompt and a closer look after generation.
A simple pose is useful when you are exploring the effect for the first time. Once you have found a carving and lighting direction you like, try a more expressive stance or a wider scene. Ask to retain the reference outfit and body pose if those are important to the concept, then check whether the result follows that request. Name distinctive clothing details, such as a checked scarf or a red jacket, so your prompt clearly identifies what to keep.
Find your version of the pumpkin head AI trend
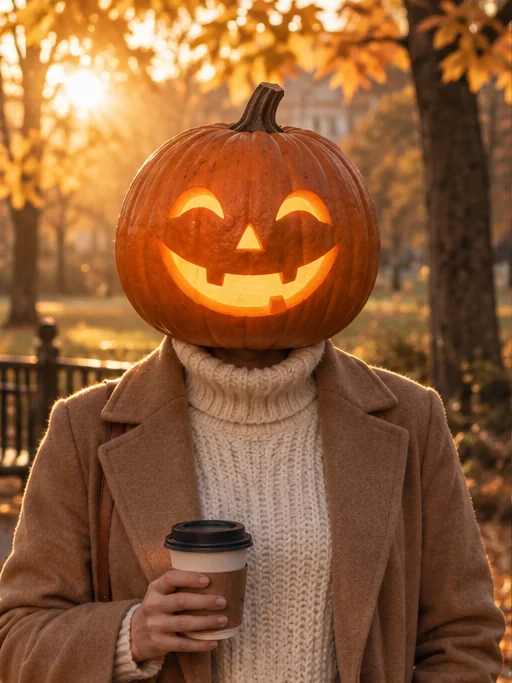
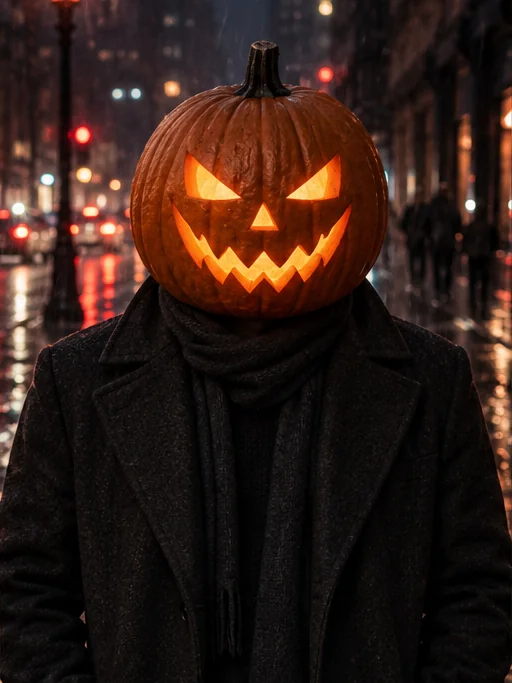
A recognizable idea becomes more interesting when the styling feels personal. For a cozy direction, try a knitted sweater, fallen leaves, and soft light from a nearby window. For something cinematic, describe a long coat, a quiet street, and one strong light source. For a playful portrait, combine a broad carved grin with bright autumn colors and an open, relaxed pose. You do not need to use all of those details together. Choose a small group that supports the same mood, then remove anything that distracts from it.
Make the pumpkin head AI trend your own by choosing an understated, theatrical, charming, or strange scene. Consider how you will use the image before writing the prompt. A profile picture needs a clear head shape at a small size. A poster benefits from space for a separate title added later. A full-length character portrait gives clothing and posture more room to contribute. Describe the framing you want instead of expecting one composition to work equally well for every use.
Write a prompt around details you can actually see
A useful prompt moves from the subject to the scene. Begin with the transformation: replace the person’s head with a whole carved jack-o’-lantern. Add an expression, such as a gentle crescent smile or narrow triangular eyes. Next, describe the clothing and pose you want to reference. Finish with the setting and light. This order helps you keep the main idea visible while editing. If your description becomes crowded, remove decorative extras before removing the instructions about the pumpkin, its connection to the body, or the direction of the light.
For example, you could ask for an autumn portrait of a standing character in a dark wool coat, a complete pumpkin head with a small friendly grin, soft evening light, and a simple garden path. Or take the same subject in another direction with an oversized cardigan, a porch chair, and cloudy afternoon light. Use the editable prompt to name what you want to see, and avoid combining contradictory instructions such as bright midday sunshine with a scene lit only by a candle.
Give the carving a character of its own
The face carved into the pumpkin can do much of the storytelling. Wide round eyes and a small smile suggest a gentle character. Angular openings and a crooked mouth create a more mischievous silhouette. An unlit carving can feel like a handmade costume, while a warm inner glow makes the head read more like a lantern. Decide whether the expression should be readable from across the image or only become clear on a closer look. A complicated carving may lose its personality when the portrait is displayed as a small thumbnail.
Texture matters too, but it works best when it supports the overall style. You might request a slightly ribbed surface, a short curved stem, or subtle variations in the orange skin. A polished fashion scene may call for restrained texture; a rustic outdoor portrait can accommodate a rougher pumpkin and earthy colors. Avoid making every surface equally dramatic. When the jacket, background, pumpkin, and lighting all compete for attention, the character becomes harder to read. Let one strong feature lead and allow the remaining details to support it.
Check the result before planning the next version
After generating, look at the whole composition before zooming into individual details. Does the pumpkin feel proportionate to the shoulders? Is the light on the head consistent with the light on the body? Does the neck or collar connect in a plausible way? Then inspect hands, clothing edges, and nearby objects. Small irregularities can stand out more in a simple portrait than in a busy scene. Choose the issue that most affects the image rather than rewriting the entire prompt in response to every difference.
If the head looks like a painted face, strengthen the instruction for a separate, whole carved pumpkin. If the lantern glow overwhelms the scene, request a gentler inner light and clearer ambient lighting. If the background feels too busy, simplify it to a wall, doorway, or path. Change one creative variable at a time when you want to understand its effect. You can download a result worth keeping and use what you learned to describe a different interpretation, rather than trying to force every possible idea into a single image.
Take a Halloween pumpkin head portrait beyond the first idea
A finished Halloween pumpkin head portrait can be the beginning of a small visual project. Plan a set around a shared outfit color, a recurring carving, or a consistent autumn setting. Write those choices down so each new prompt starts from the same creative direction. You might contrast a quiet daytime scene with an evening version, or place a similarly styled character in different seasonal surroundings. Reuse the same reference photo and repeat the key carving and outfit details in each prompt, then select images that work well together.
Think about presentation after you have selected the images, not before you have inspected them. A collage can bring contrasting moods together, while a single portrait may work better when the carving deserves all the attention. Keep the final crop clear around the stem and shoulders, and leave room for any text you intend to add separately. The goal is not to collect every Halloween symbol in one frame. It is to make a character, an outfit, and a setting feel like they were chosen for the same imaginative photograph.